一、安装 参考:
https://od.cloudsploit.top/zh-CN/tools/BinaryNinja/
Binary Ninja 5.1.8005 Personal - 吾爱破解 - 52pojie.cn
修复binaryninjacore.dll前记得备份,之后将修复好的binaryninjacore.dll以及生成的license.dat复制到Binary Ninja目录下。
如果之前安装过Binary Ninja,需要删除缓存文件(%APPDATA%\Binary Ninja\)。
二、使用 文件加载基址设置 通过Analysis -> Rebase将基址设置为0(不要勾选Relative),方便地址定位。
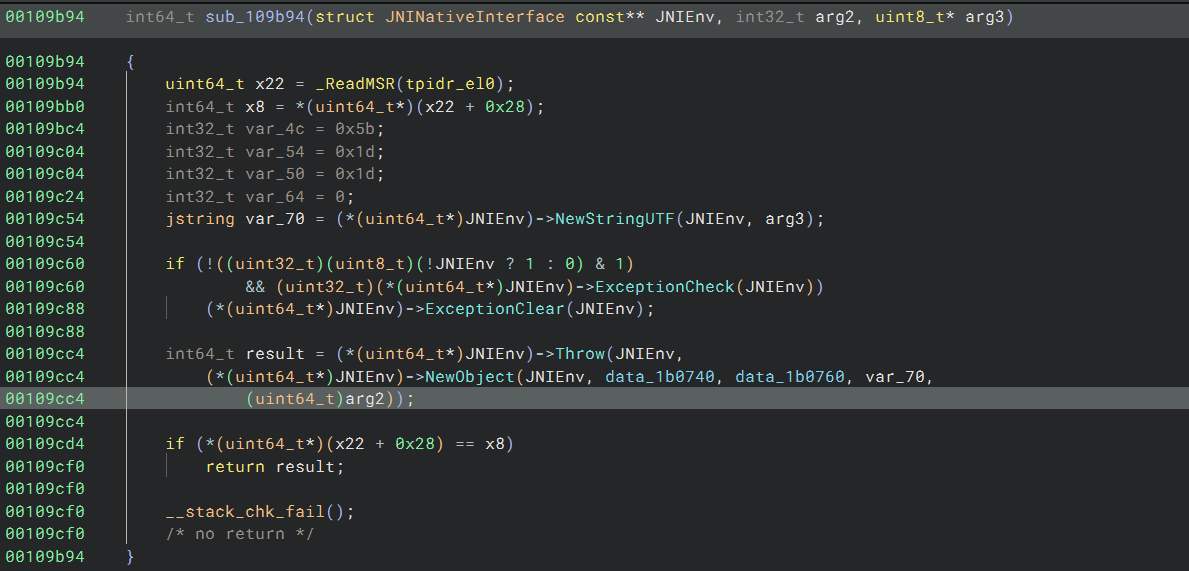
JNIEnv识别 为了让Binary Ninja能够识别JNIEnv类型,需要将 jni.h 文件导入。顶部菜单栏选择Analysis -> Import Header File,选择jni.h文件,点击Preview可以查看它依赖的库文件是否导入了。当然我们需要对jni.h文件进行修改,使其不依赖其他库函数,即手动定义最小 JNIEnv,因为我们只关心函数指针调用。
对于JNIEnv类型参数的重定义,参考ida,通过如下方式定义
1 struct JNINativeInterface const ** JNIEnv
这样才将偏移量识别成函数。结果如下
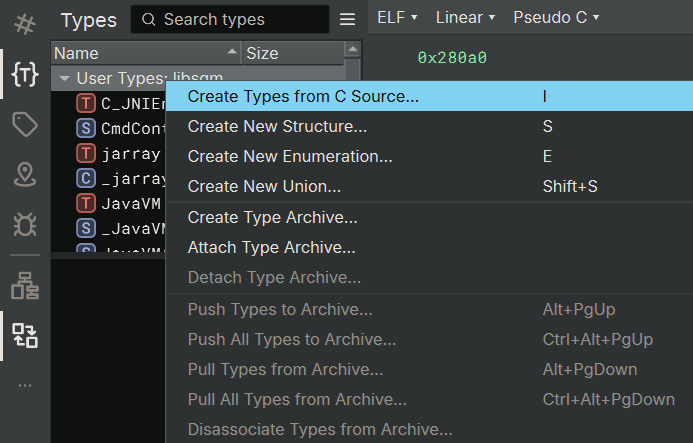
结构体定义 通过如下方式可以使用C语言定义结构体(第二个选项就有点麻烦了)
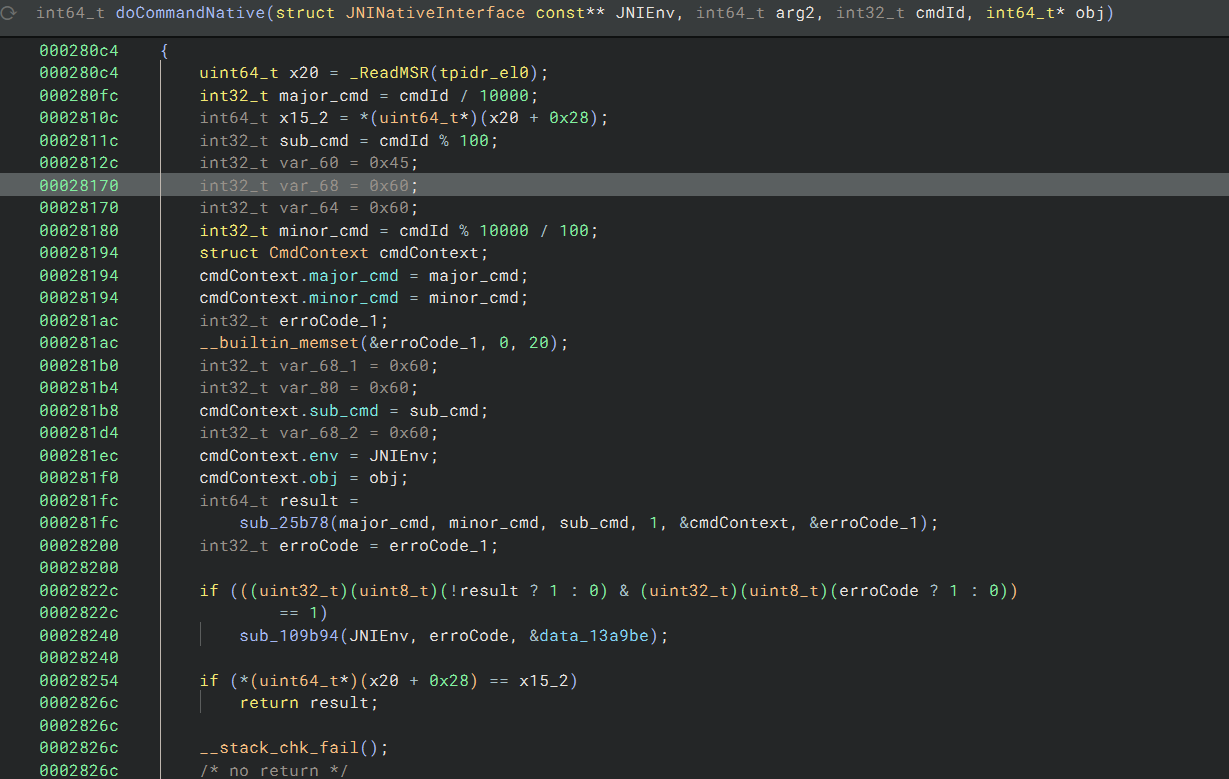
1
2
3
4
5
6
7
8
struct CmdContext {int32_t major_cmd; int32_t minor_cmd; int32_t sub_cmd; int32_t padding; struct JNINativeInterface ** env; int64_t * obj;
定义好后,对目标变量右键,选择Change Type即可修改变量类型。
最终效果如下
patch修复 参考:https://docs.binary.ninja/dev/bnil-modifying.html#support
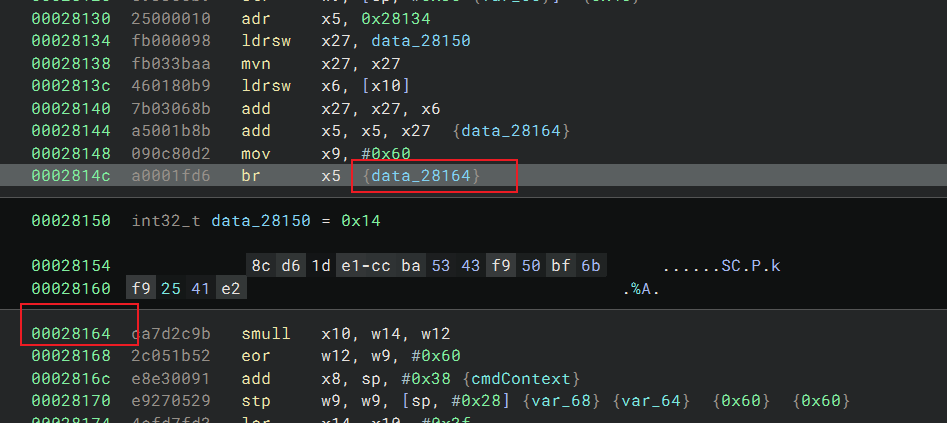
它是通过遍历函数的IL指令进行修复的,对于没能识别成函数的部分,则无法修改。因此建议直接修改PE文件的字节码,再通过Ninja分析。以下是一个寄存器间接跳转修复的例子:
Binary Ninja能够通过静态分析自动计算出这类跳转中寄存器的值(即跳转地址)。例如
然而,它也会由于计算的问题而产生错误的跳转地址。例如
1
2
3
4
5
6
7
8
9
10
00509 bc8 3 a000010 adr x 26 , 0x509bcc 00509 bcc 31010098 ldrsw x 17 , data_509 bf0 00509 bd0 31420291 add x 17 , x 17 , #0 x 90 00509 bd4 31e20291 add x 17 , x 17 , #0 xb8 00509 bd8 314202 d1 sub x 17 , x 17 , #0 x 90 00509 bdc 540180 b9 ldrsw x 20 , [x 10 ] 00509 be0 310214 cb sub x 17 , x 17 , x 20 00509 be4 5 a03118 b add x 26 , x 26 , x 17 {0x100509c04 } 00509 be8 a80380 d2 mov x 8 , #0 x 1 d 00509 bec 40031 fd6 br x 26 {0x100509c04 }
根据gemini分析,说是错误的进行了符号扩展。
然后根据官方文档bnil-modifying ,让gemini生成的br跳转的patch脚本
1
2
3
4
5
6
7
8
9
10
11
12
13
14
15
16
17
18
19
20
21
22
23
24
25
26
27
28
29
30
31
32
33
34
35
36
37
38
39
40
41
42
43
44
45
46
47
48
49
50
51
52
53
54
55
56
57
58
59
60
61
62
63
64
65
66
67
68
69
70
71
72
73
import binaryninjafrom binaryninja.enums import LowLevelILOperation, RegisterValueType, SegmentFlagdef fix_overflow_jumps (bv ):print ("[*] 正在等待分析完成..." )print ("[*] 开始扫描并修复 BR 寄存器跳转溢出问题..." )0 for func in bv.functions:if llil_func is None :continue for block in llil_func:for instr in block:if instr.operation == LowLevelILOperation.LLIL_JUMP:if value.type in [RegisterValueType.ConstantValue, RegisterValueType.ConstantPointerValue]:if wrong_addr >= 0x100000000 :0xFFFFFFFF if segment and segment.executable:print (f"[!] 正在替换 IL 表达式 @ {hex (instr.address)} : {hex (wrong_addr)} -> {hex (correct_addr)} " )8 , correct_addr)1 if fixed_count > 0 :print (f"[*] 深度修复完成,共替换 {fixed_count} 处表达式。" )
结果还是挺可观的!